Being a professional real estate photographer, I am often asked for simple ways that real estate agents can improve their own photography of their listings. I hope you will enjoy this easy guide to photographing homes, and while you won’t be able to get professional images, at the very least you will start taking better photos of your listings.
Make Sure The House Is Cleaned Up First
You wouldn’t have an open house if the listing was completely cluttered, would you?
Then why would you have a “virtual open house” before the owners have had a chance to clean up? There are going to be A LOT MORE people viewing the house online than there will be open house visitors, so ensure the listing looks as nice as possible before the shutter falls.
Yes, it MIGHT mean an extra trip out to the property since you will have to wait until AFTER the house is cleaned up and de-cluttered, but remember this:
First Impressions Last!
Remember that the number one rule of photography is, “The better things look in front of the lens, the better a photograph you are going to take.”
Get The Walls Straight and Vertical
Take a look at a nearby wall. It is straight up and down, right?
So why are there so many real estate photos out there where the walls are slanted over? Was the architect drunk when they drew up the plans?
Here’s how to get the walls looking straight and vertical; hold the camera nice and parallel to the ground. It’s that simple. Don’t tilt the camera up, don’t tilt it down. Just keep it nice and level. A good tripod certainly helps this (a LOT, actually), but if you are using a smartphone or tablet or any camera, just do your best to make sure your shot is nice and level.


Take Photos From The Right Height
A big mistake that nearly all real estate agents make is taking interior photos from too high up (near eye level), and taking exterior photos from too low. Improve your photographs by shooting interiors from around waist level. Shoot exterior photographs with the camera at a level that is high enough to get the whole house in the frame without having to tilt the camera up. When you tilt the camera up, it looks like the house is falling down backwards (see section about Getting the Walls Vertical).
Sometimes you can get a better photo of the home exterior by crossing the street and zooming in with a telephoto lens. With real tall homes and narrow streets, the best shot can often be taken by mounting the camera on a pole, or climbing on top of a ladder (or on top of your car) to minimize the amount you have to tilt the camera.


Turn Off The On-Camera Flash
The built-in flash on cameras makes people look ghastly, and it certainly makes houses look even worse. And more importantly, it gives you a false sense of confidence that the camera will take care of everything automatically.
It won’t.
Do yourself a BIG favor and turn off the on-camera flash. In almost all cases, it will make your photos look worse, due to the way that the camera sensor “sees” the brightness of an image. Plus it usually creates ugly shadows and distracting reflections.
If you have a separate shoe-mount flash (like one of the Nikon SB series flash guns or a Canon EX style flash gun), you can sometimes improve the shot by using the flash in the camera hot shoe and then “bouncing” the light off of a wall or ceiling. But almost all professionals use several flash guns (as in more than three) and a small arsenal of light stands, umbrellas, and reflectors.


Don’t Photograph Too Wide
Many real estate photographs are shot too wide; the shots were taken in a hurry and they tried to get as much in the scene as possible in as little time as possible. Or they just really want to show HOW BIG THE ROOM WAS.
When you photograph too wide, things in the foreground look HUGE, while often the items in the background that you are trying to emphasize look smaller. So the cheap coffee table in the foreground looks ginormus while in the background, the kitchen with all the upgrades looks tiny.
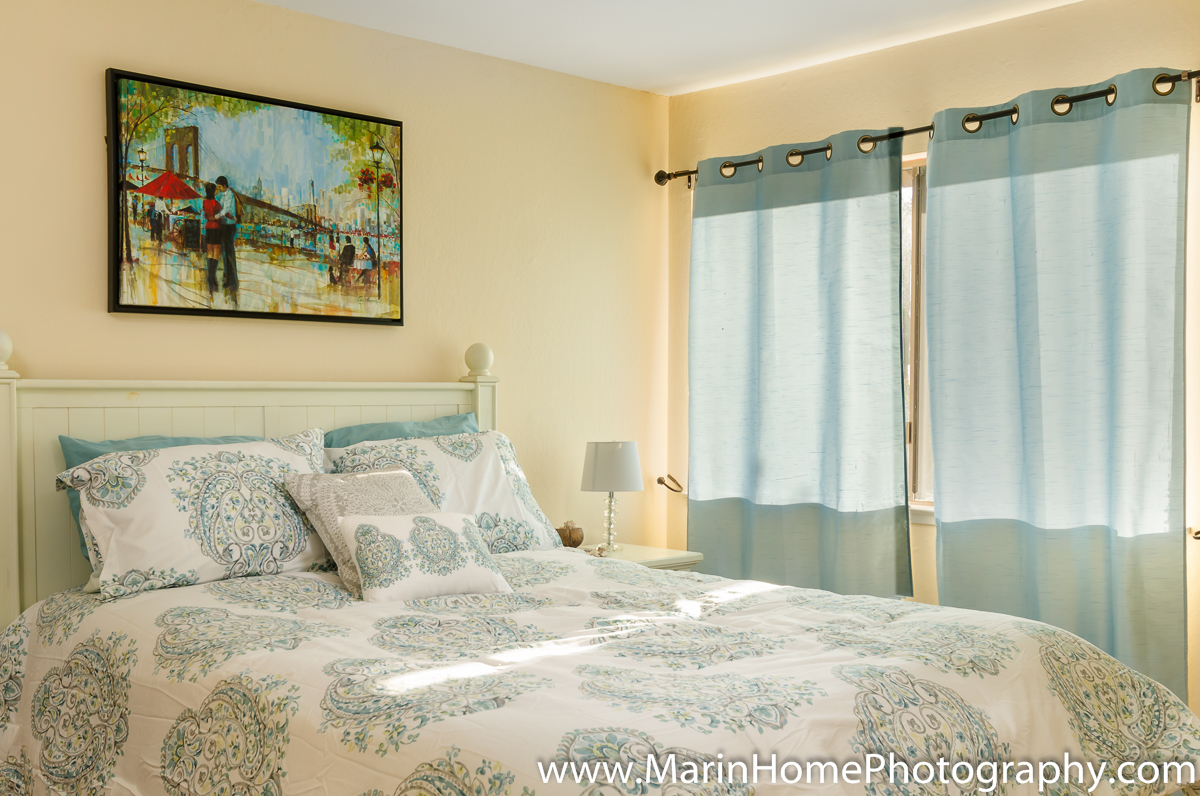
Focus On What Conveys
Figuratively and literally, focus on what conveys with the sale of the home – and what is special about each room. In a bedroom, it often means showing LESS of the bed, and emphasizing the view out the windows and the closet area as well (buyers like big closets, as you probably know). Potential buyers want to know more about the view from their bedroom than what type of bed the old owners had.


In the kitchen, you may need to take a couple of photos, each one emphasizing different aspects (and different angles). It’s good to have a shot that includes windows, since people prefer bright kitchens with natural daylight steaming in. But also be sure to show off expensive appliances that convey with the home.
Don’t Photograph Bathrooms Unless You Are Either A Genius Or An Idiot
Hopefully you are the former and not the latter, but if you are somewhere between the two, then ask yourself if you really need to photograph the bathroom.
Bathrooms are usually poorly lit, very tiny, are often cluttered, and have mirrors that reflect you in them. Also, it is often hard to show off the nicer amenities in the bathroom without having the toilet in the way.
Some homes have really nice bathrooms and they add value to the price of the home. Go ahead and photograph them, but remember that the better the bathroom looks, the better your photograph should be. If the home owner put thousands of dollars from their own pocket into creating a beautiful bathroom, you had better spend the time and effort to make it look nice.


Balance The Brightness As Best As Possible
Avoid having areas of a room that are way too bright and other areas that are so dark you can’t tell what is in the photo. The difference between the brightest parts of a photo and the darkest parts is called Dynamic Range, and even with the MOST EXPENSIVE cameras (we are talking over $3,000) you are not going to be able to capture much of the detail in both the bright areas and the dark areas without using a combination of flash lighting and multiple exposures blended together.
Since light coming in from the window is almost always brighter than the electric lighting in a room, you can (generally) get a better balance between too bright and too dark by turning on all the lights and closing the shades part way. Unfortunately, this means that the shutter speed of your camera will have to stay open longer, and that means you can end up with blurry photos.
One thing that can help mitigate this (to a certain extent) is try to only include areas of the same relative brightness in the photo. If you are taking a photo to show the window view from a room, then you may only want to include the areas of the room that are immediate to the window and have a similar brightness. On the other hand, if you want to emphasize a part of the room that is in shadows, try to include mostly areas that are not overly bright.
It’s A Kitchen… Not A Bowing Alley!!!
Similar to not using too wide of a lens, if you try to photograph a galley kitchen from one end while including the walls on both sides, you can make it look like a place to try and pick up and 8-10 Split instead of a place to cook wonderful meals for family and friends.
Instead, try taking two photos, one for each side of the kitchen. Again, try to photograph those items that convey with the home.
And speaking of kitchens, this is one area that could really use some dejunkification before photographing; it’s surprising how cluttered a kitchen can become. You can often put a lot of counter-top clutter into the sink, take the shot, and quickly put it back onto the counter.


Fix Your Mistakes In Lightroom and Photoshop
Ok, despite your best efforts, your walls are tilting over, and the beautiful view outside is way too bright while the kitchen looks way too dark, and many of the photos look very orange due to the light bulbs in the room (or green because of fluorescent lighting… Yuck!!!)
You are going to need some decent software (most professionals and serious amateurs use Lightroom or Photoshop, but often both), and use the perspective controls to correct the tilt, highlights and shadow controls to tame the brighter parts and open the shadows, and white balance adjustments to make the colors look more natural.
Note that when you use software to correct perspective, significant parts of the photo get cropped out. So shoot about 20% wider than the house if you have to tilt the camera a lot and correct it with software.
The bad news is that it takes time and effort (and a good computer) to correct significant mistakes. The good news is that if you just use some of the auto correct functions of the software, you can at least make them look better than before. But there is one important thing to remember…
Shoot in RAW format instead of in JPG format
Without getting into techno-babble, if you are going to be doing any post-processing of your images in photoshop or lightroom, you will want to photograph your listings using the RAW format instead of the typical jpg format that most cameras have selected by default. Shooting in RAW gives your computer software more information to work with than shooting in jpg.
The downside is that raw files are often MUCH larger than jpg files (often four times or more larger), and they take up more room on your SD card. They also take longer to download from your camera to your computer, take up more hard drive space on your computer, and once you edit them, you will have to export them back as jpg files (for using on the web) or as tif files (for printing – although some of the discount printing labs WANT jpg files instead of tif files).
Camera Equipment Buying Tip
Instead of buying a $3,000 camera and a single $200 lens, you should instead buy a decent mid-level camera (under $1,000), and a few really good lenses. You will want to cover the equivalent of 16mm to 50mm (on a full frame camera). At the present time, you would probably need a couple of short zoom lenses do to this, and they ain’t cheap.
If you are shooting with a crop sensor / APS-C / Nikon DX format, then you are going to want to cover the range from around 10mm up to 35mm.
Here are some of the more affordable possibilities that you could start out with. I recommend staying with either Nikon or Canon since they are the most popular, and quite simply because if you have problems, you are more likely to find another agent nearby who can help you out, or find some info on the internet on how to use them:
Package 1 for Nikon:
Nikon Camera: Nikon D5300 DSLR with 24MP Sensor, Body only
Nikon-Compatible Lens: Sigma 10-20mm f/4-5.6Lens for Nikon
Package 1 for Canon
Canon Camera: Canon T5i DSLR Camera, Body Only
Canon-Compatible Lens: Sigma 10-20mm f/4-5.6 Lens for Canon Cameras
This will cover about 80% of what you might want to shoot. Notice that for the camera, I suggest buying JUST the camera and not the “combo package” lens that normally comes with the camera. Instead, by the Sigma 10-20mm lens as it will be more useful for Real Estate Photography.
However, there may be times when you would want a longer zoom lens as well. (I usually bring up to 4 different lenses when I photograph a listing, but you should be able to get away with just two lenses.)
Second (Optional) Lens For Nikon Cameras:
Nikon 18-55mm f/3.5-5.6 VR II Lens
Second (Optional) Lens For Canon Cameras:
This is a pretty good lens to buy AFTER you already have bought the Sigma 10-20mm lens. It is most helpful when photographing larger yards, or when you are in larger rooms. It can also help out when you want to photograph the front of the house a listing from across the
I personally bring a long telephoto zoom as well. When photographing the exterior of a home, I like the compression you get by backing away from a home and zooming in significantly. Plus it helps to prevent having the home appear like it is falling over backwards.
Remember, these tips alone won’t get you professional-level results. But if you insist on photographing your listings yourself, you can at least improve your results by following them.